Pre - Exercise 1
1.0 - Introduction
In order to start with the Frabitztown Model System, a copy of the Frabitztown network in EMME is required. This can be accomplished in two ways, creation of the network manually or by utilizing the network package provided. This section is focused on the latter approach. It will guide you through creating a project in EMME, adding in the TMG Toolbox, and importing the Frabitztown Network Package.
1.1 - Create an EMME Project
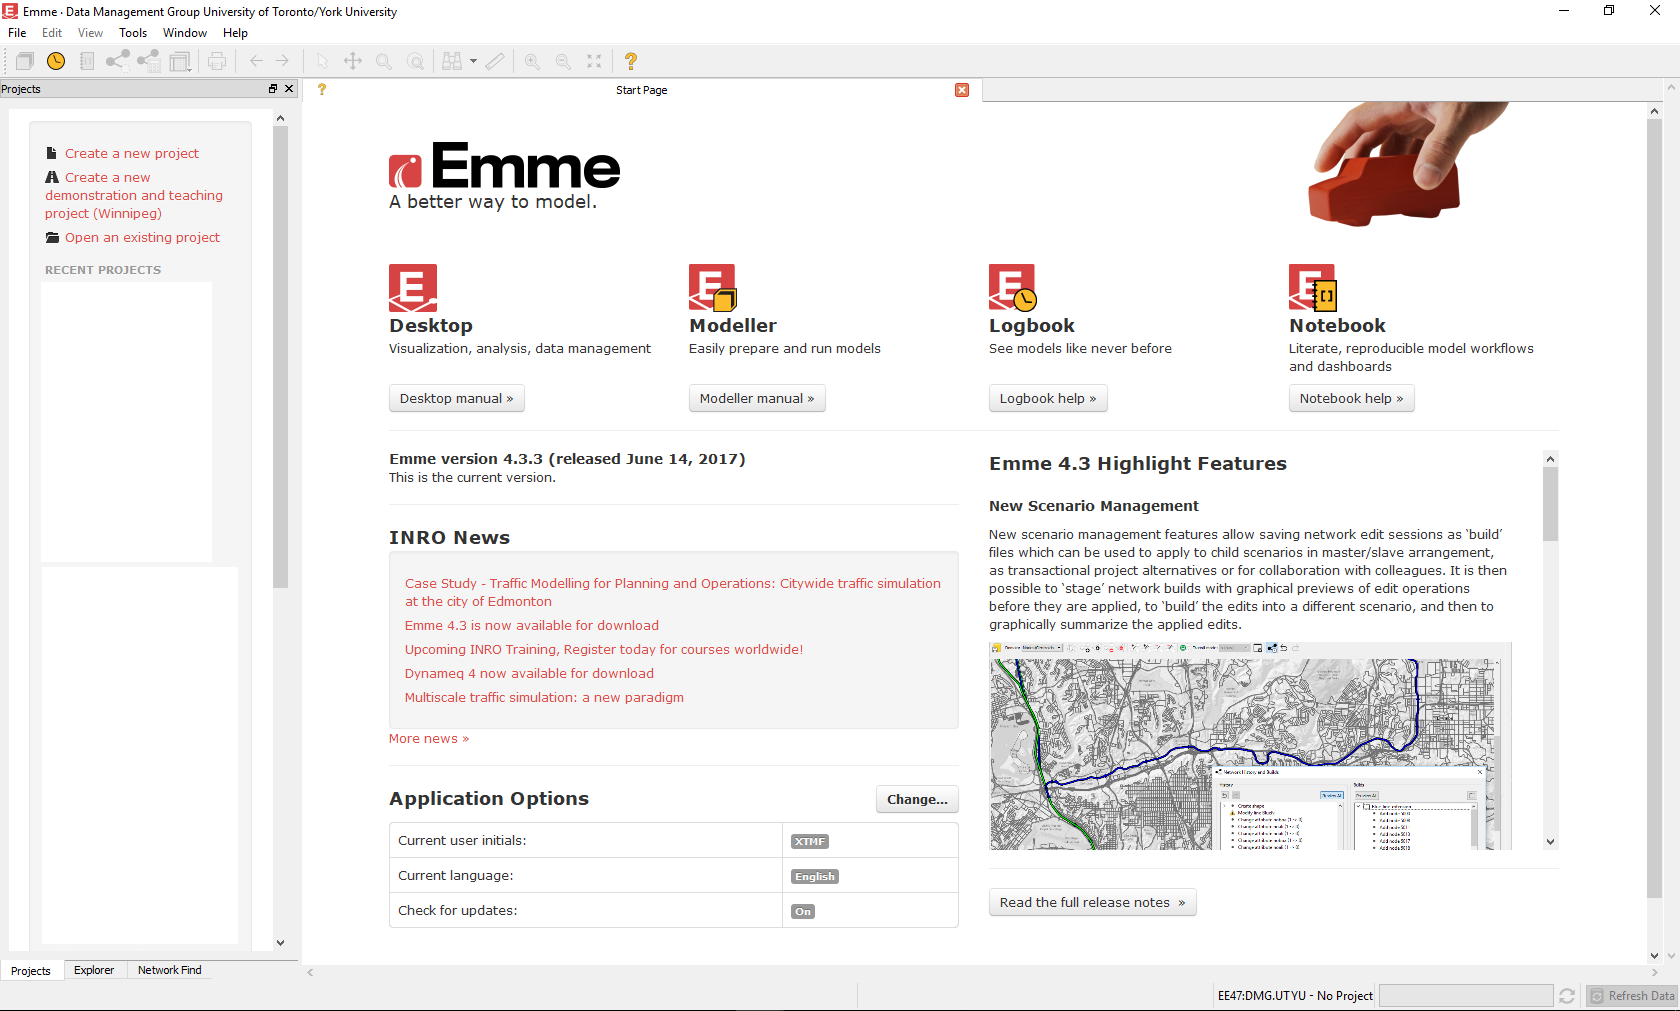
After opening EMME, the start-up screen should appear like Figure 1
Note: This is EMME 4.3.3, yours may look different
The first step would be to click “File”->”New”->”Project” (see Figure 2). This would bring up the Create Project Window (see Figure 3)

It is recommended to use Frabitztown as the name of the Project (see Figure 3). The Description and Project Location is left up to the user to decide and save where they see fit. After finishing, select “Next”.

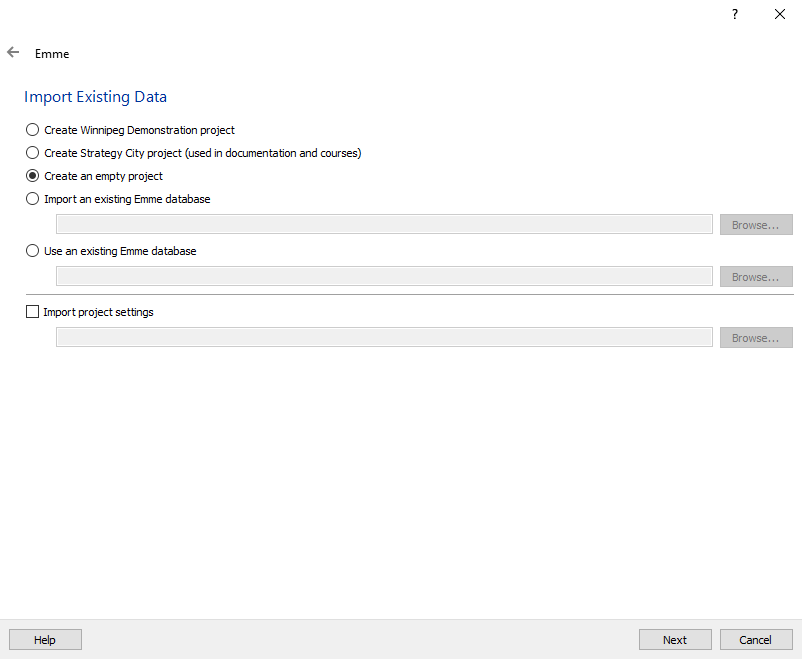
In the next screen entitled “Import Existing Data”, select “Create an empty Project” and then the “Next” button as seen in Figure 4.
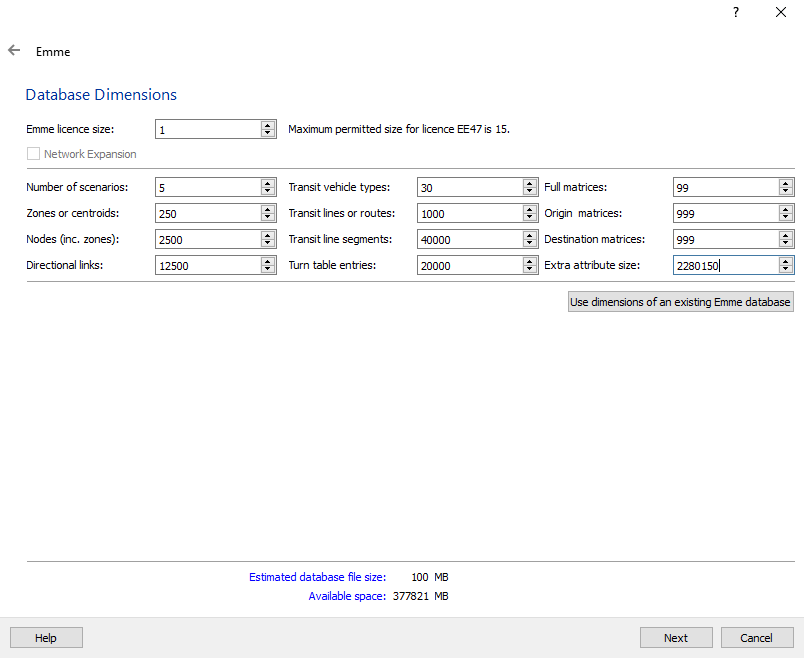
The following screen requires input for the dimensions of the database. It is recommended to use the dimensions specified in Figure 5. After they are inputted, please click “Next”.
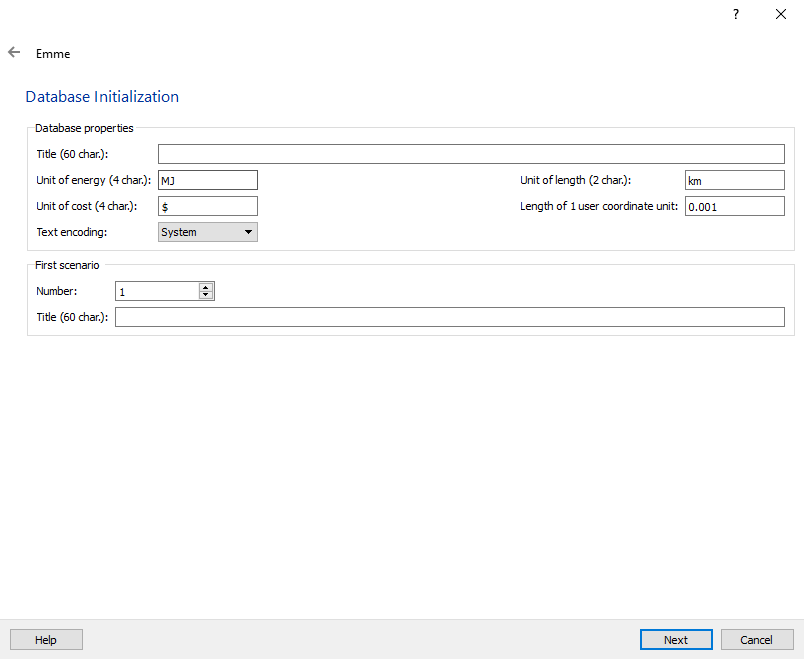
In the next screen, “Database Initialization” the “Length of 1 user coordinate unit” should be changed to 0.001. The other inputs should match the image below. The title of the database and the title of the first scenario are both left up to the user to decide. However, they can both be blank, as shown in Figure 6.
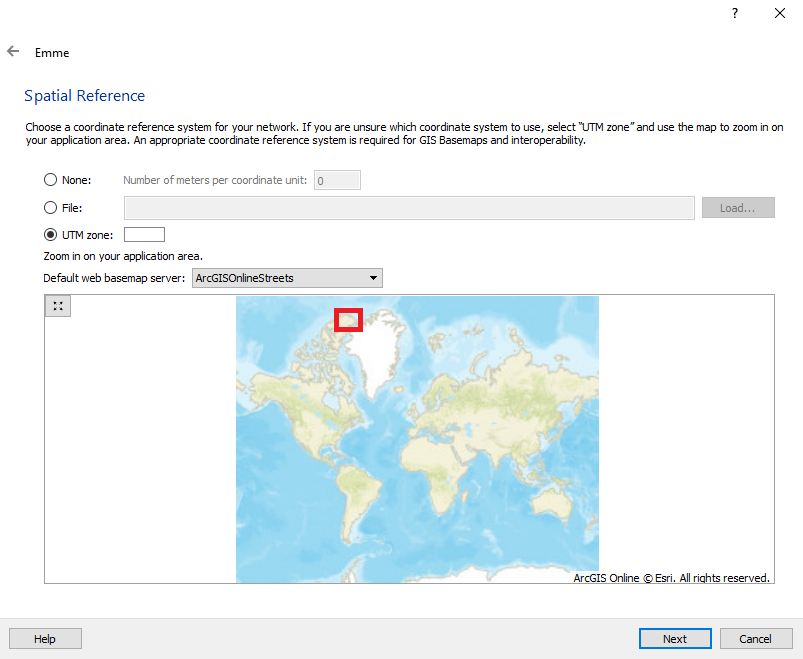
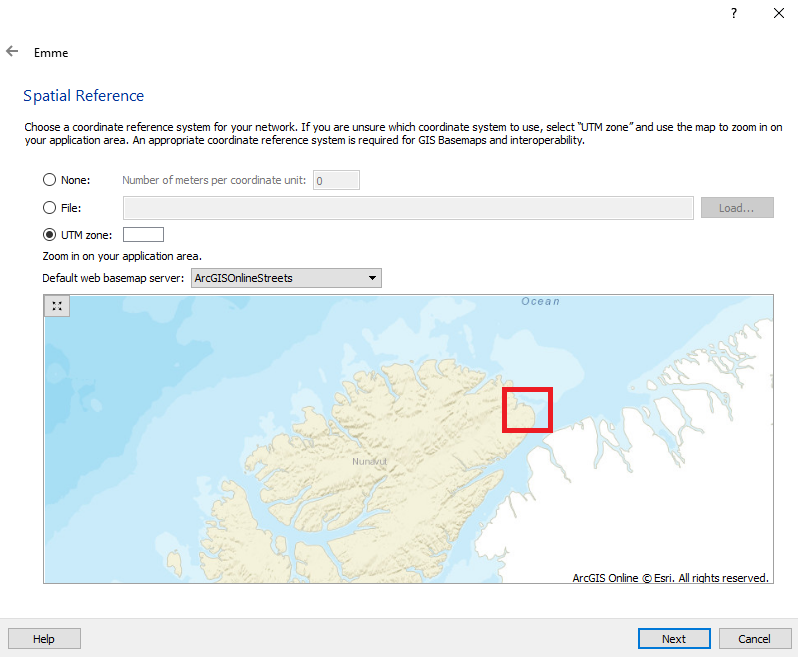
On the next window, the spatial reference of the project needs to be specified. Frabitztown is located in the far north, in the approximate location of Alert, Canada. To find the correct location of Frabitztown, follow the red rectangle in Figures 7, 8, 9 and 10.
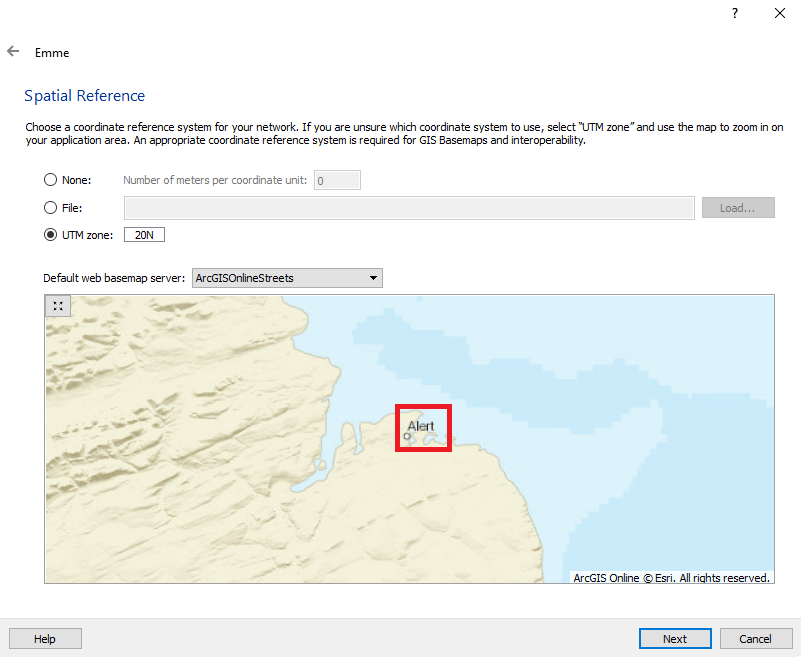

By the Figure 10, the UTM Zone should have autopopulated with “20N” as shown. When this is done, click “Next”.
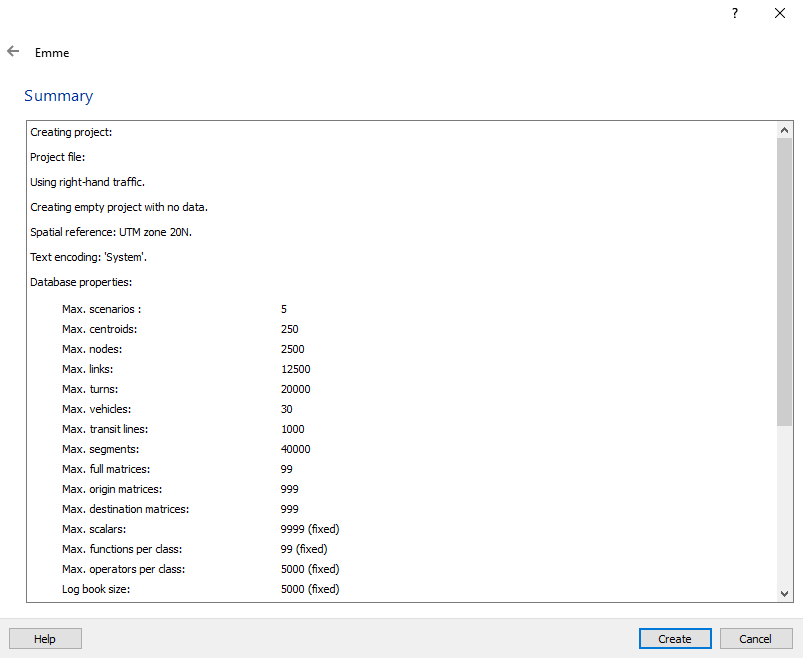
In the summary window, please verify that all the information is correct and then press “Create” (see Figure 11).
Note: that the Project Name that was specified by the user should be the same as the name shown beside “Creating Project” and the Project Location will be shown beside “Project File” followed by “/ProjectName.emp”.
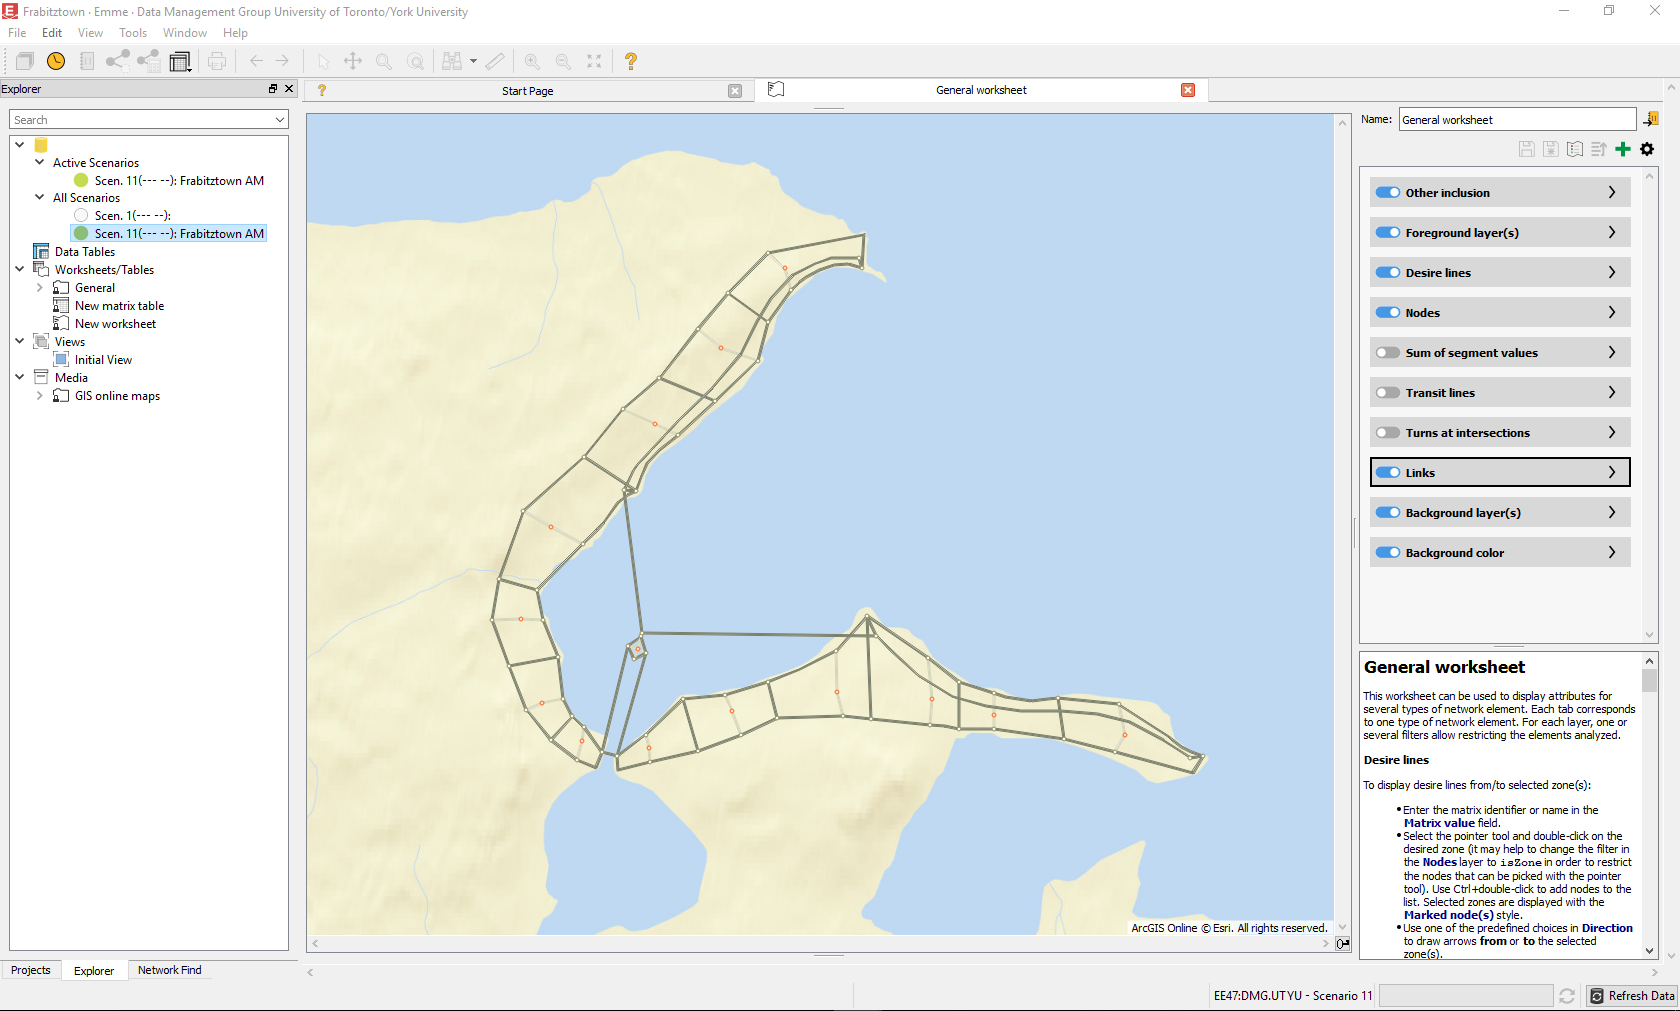
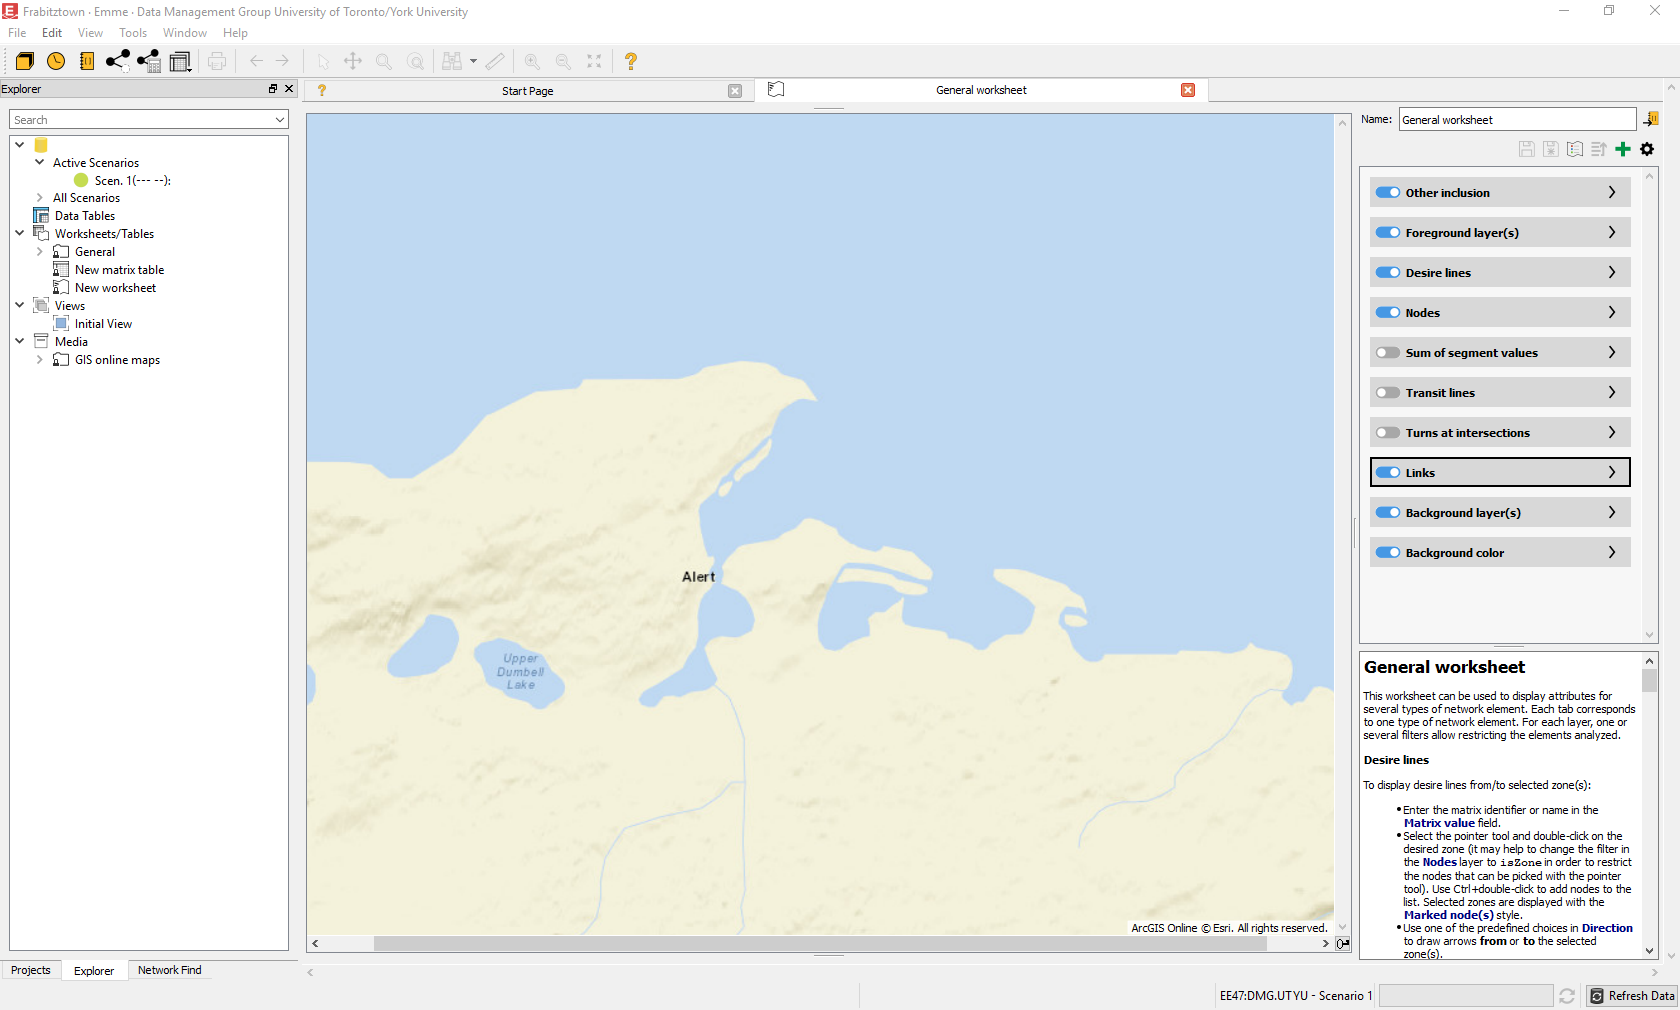
This leads to the project being created and the General Worksheet being opened (see Figure 12).
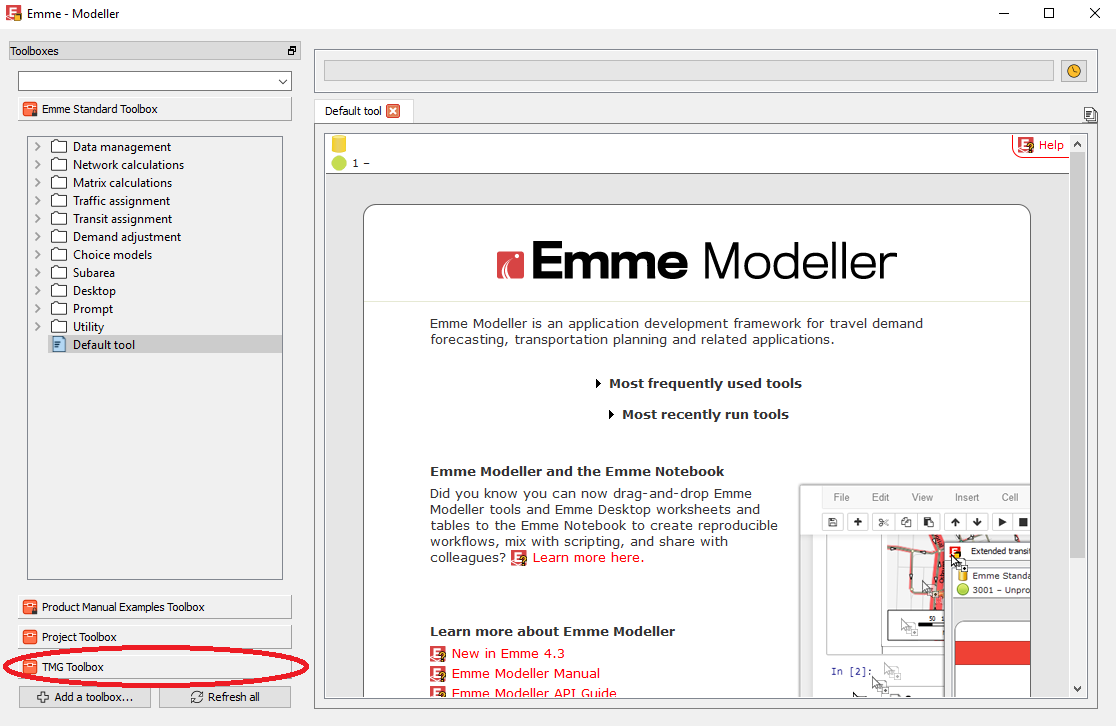
1.2 - Adding the TMG Toolbox
As XTMF and the TMG Toolbox are both required to run the Frabitztown Area Model, it is necessary to add the TMG Toolbox to the EMME Project. The TMG Toolbox is a collection of tools built by TMG that add capabilities to EMME and allow for easier workflows when performing assignments and analyses.
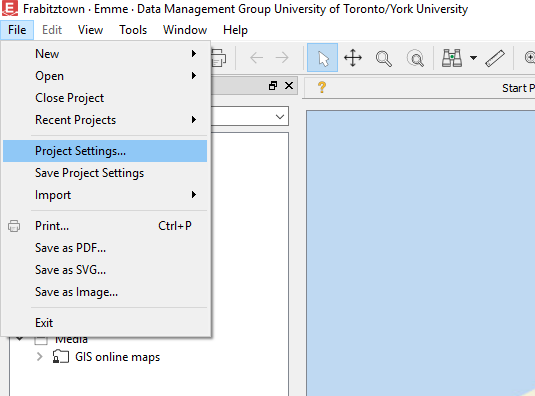
After creating an empty project in EMME (see Section 1.1), adding the toolbox is done by clicking “File” -> “Project Settings” (see Figure 13)
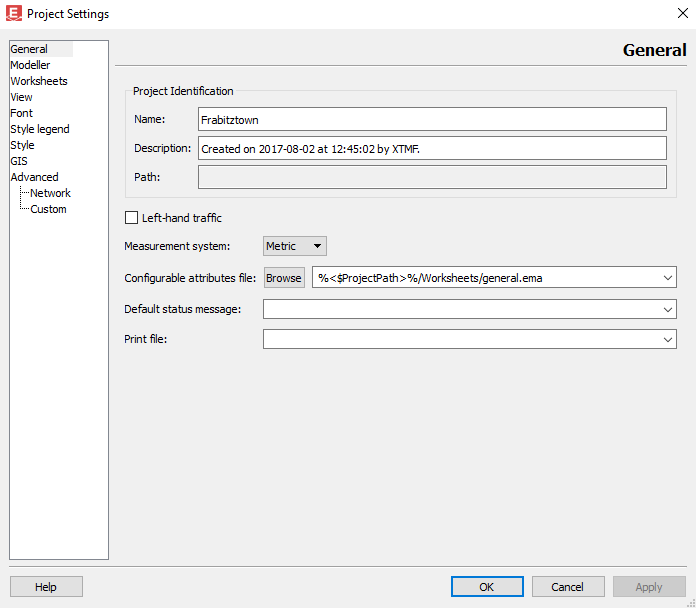
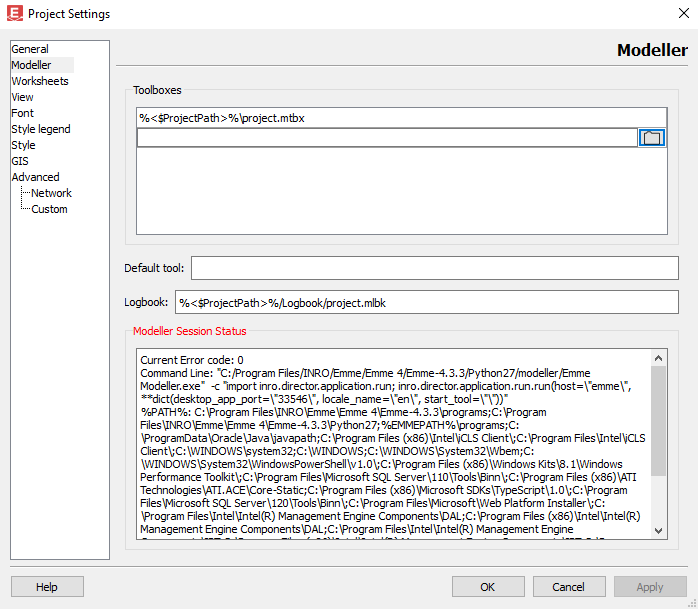
This brings up the Project Settings window (Figure 14)
Note: Your project path will appear beside “Path”
After this appears, click “Modeller” as it appears on the left side list (Figure 15)

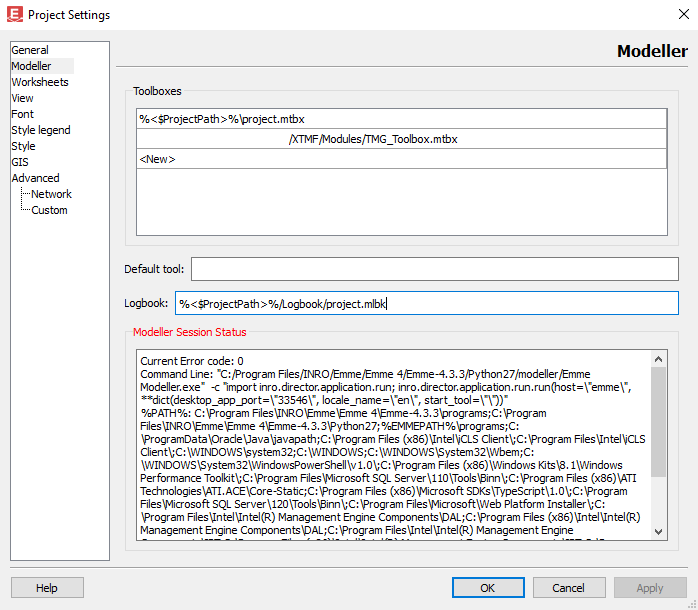
To add the toolbox, double click the “<New>” message as it appears in the Toolboxes list. This leads to the file explorer icon being shown on the right side of the window, as seen in Figure 16.
Please click the file explorer icon and navigate to the place where XTMF is saved. The TMG Toolbox will be stored in the following path Your XTMF Main Directory\Modules\TMG_Toolbox.mtbx
For Example, if my XTMF main directory is “C:\Users\John Smith\Documents\XTMF” then the TMG Toolbox will be found in “C:\Users\John Smith\Documents\XTMF\Modules\TMG_Toolbox.mtbx”
IMPORTANT: After the TMG Toolbox has been added, please click anywhere in the white space of the “Toolboxes” List such that “<New>” appears again. This is shown in the Figure 17. Only after it appears, click “OK”.
Finally, in order to ensure the project settings are saved, click “File” -> “Save Project Settings” (Figure 18)

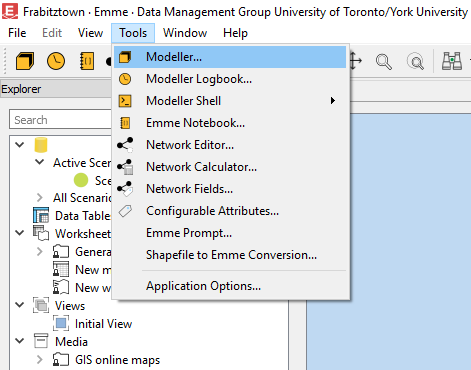
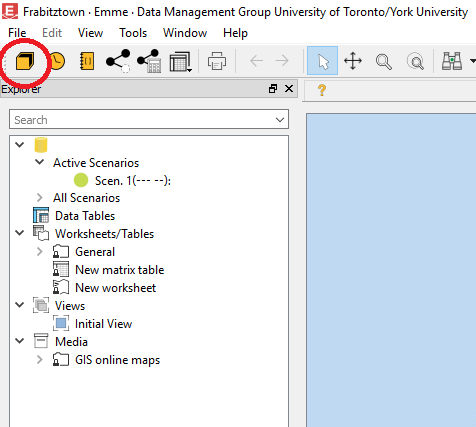
Now when opening Modeller by using “Tools” -> “Modeller” (Figure 19) or by clicking the “Modeller” icon (Figure 20), the TMG Toolbox will appear in the list of Toolboxes (Figure 21).
1.3 - Importing the Frabitztown Network
This section imports the Frabitztown Network into your EMME project using the Frabitztown network package as found in the required files. This can be accomplished in two ways, using the Modeller Interface and by using the XTMF interface. This section focuses on the former.
To begin with, add the TMG Toolbox (see Section 1.2), open modeller, click “TMG Toolbox”, double click “Input Output”, and then double click “Import Network Package” to get to the “Import Network Package” tool page (Figure 22)
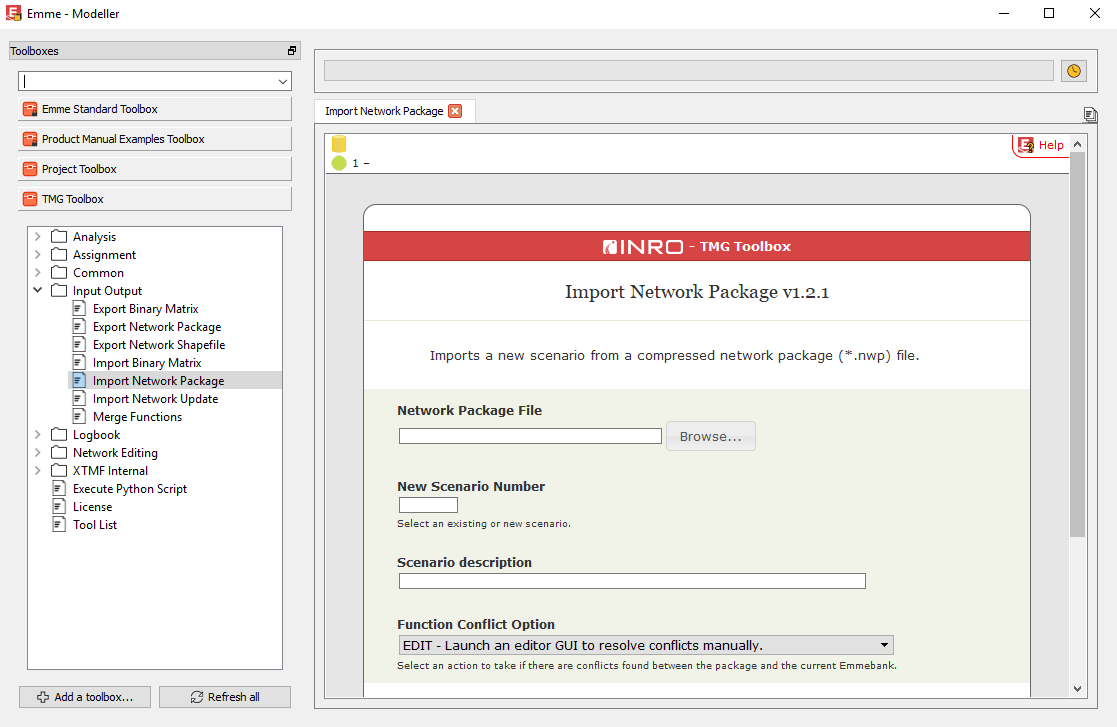
Under “Network Package File” click “Browse” and navigate to the location where the Frabitztown network package was saved. The rest of the inputs should be similar to Figure 23. It is recommended to use Scenario 11 for this network package.

When this is done, click the “Run” button and wait for it to finish importing.
After it is done importing, close Modeller and press “Refresh” on the “Refresh Data” dialogue that pops up (Figure 24)

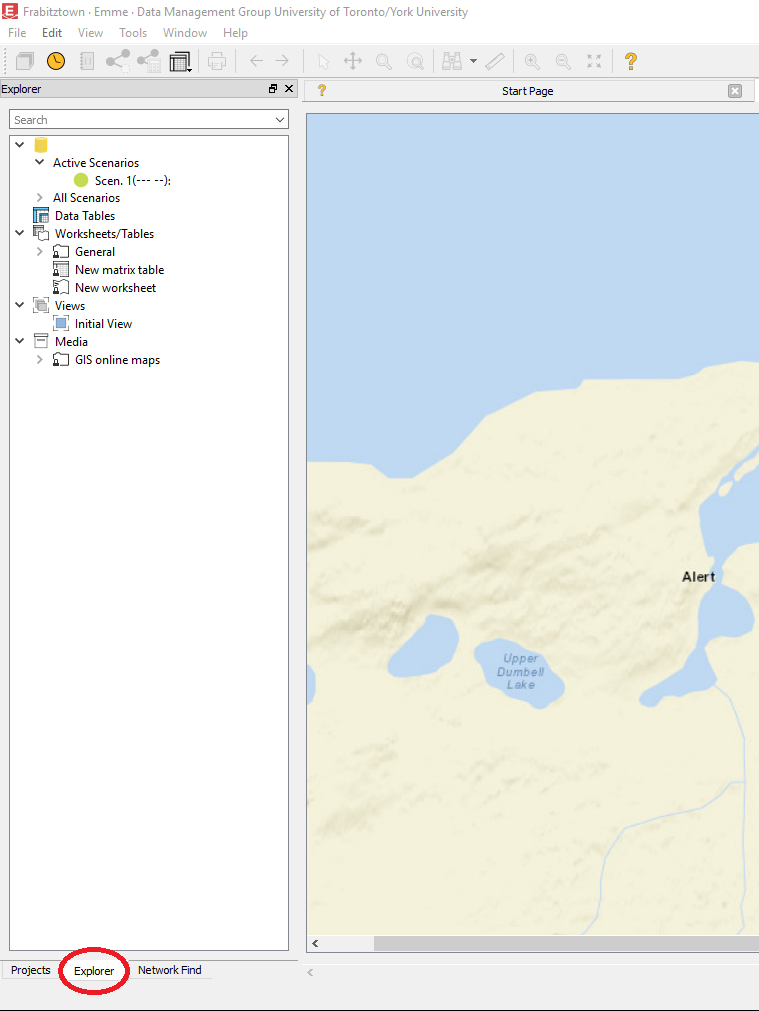
In order to see the network, the correct scenario needs to be the primary scenario. To change scenarios, click the “Explorer” pane found on the bottom left side of the screen (Figure 25)
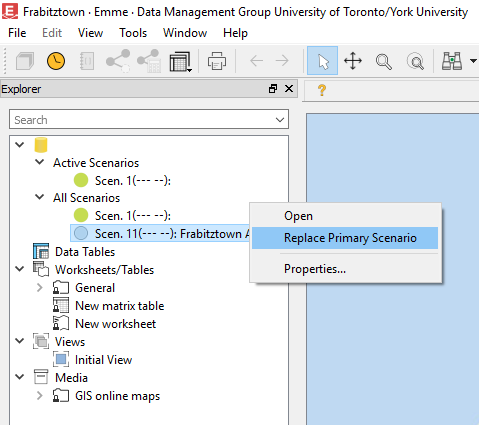
Then click the drop down icon beside “All Scenarios” and right click on “Scen. 11 (— –)…” and press “Replace Primary Scenario” (Figure 26).
The network will then appear on the screen as shown in Figure 27.